
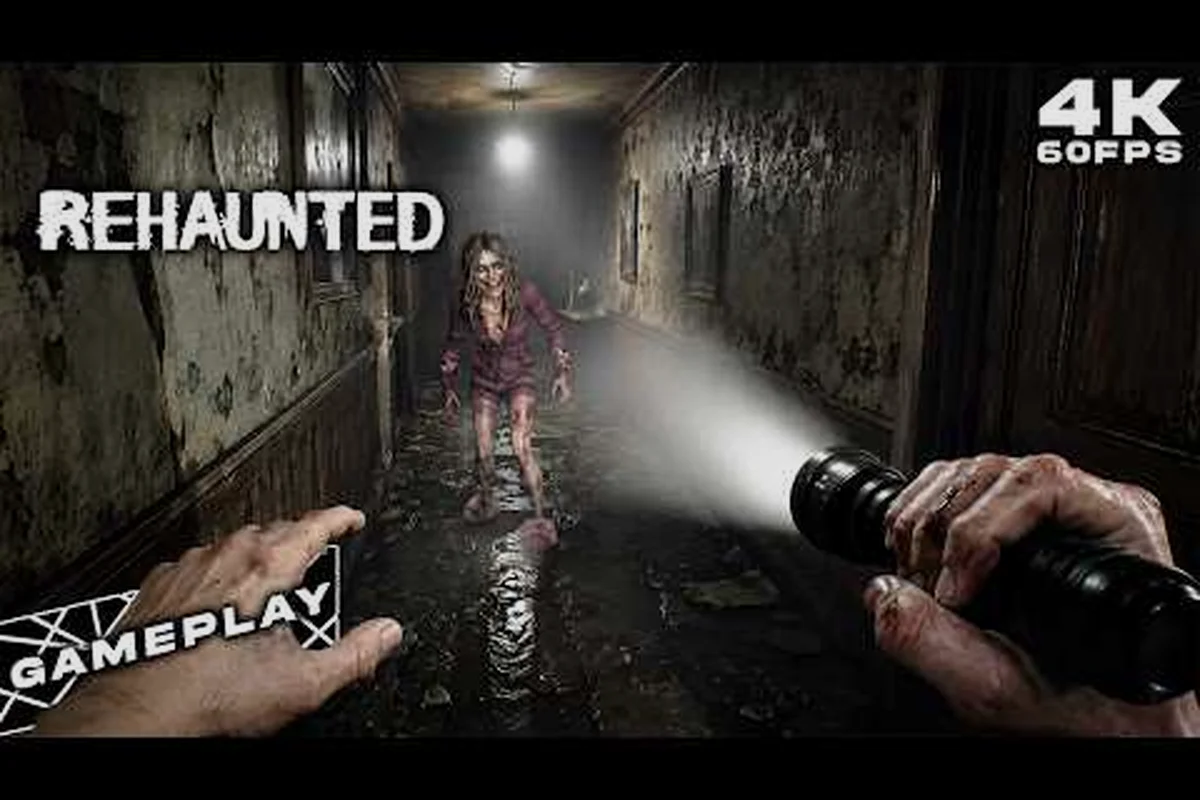
Missing even a single fragment can collapse a Rehaunted investigation, because the case only resolves when every entry on the evidence board agrees. This walkthrough maps the most frequently skipped leads, the tell-tale signs of conflicting clues, and the exact steps for wiring Rehaunted contradictory evidence together before the case locks. Detective Connor Raines has one house, one night, and a single set of tools to piece it all together, so every Rehaunted missable clue you leave behind is one more wall between you and a clean ending.
The tools at your disposal are limited on purpose. According to the IGN gameplay preview of Rehaunted, you work with a UV flashlight, magnifier, camera, walkie-talkie, and the evidence board itself. Each device reveals a different slice of the house, and each device can hide a clue from the other two, so a missed object rarely returns on its own. Knowing which tool reveals which fragment is the difference between a complete board and a case that ends with the wrong accusation.
How Rehaunted Evidence Boards Read Contradictory Leads
The evidence board is a living graph, not a scrapbook. Every icon you pin becomes a node, every line you draw becomes a claim, and the game only accepts a line when both endpoints actually agree. Conflicting clues are pairs of nodes that share a subject but disagree on a detail, and the board colors those edges red until you resolve them. Players report that the resolution path is almost always one of three patterns: re-examine the source object, cross-check the timestamp on the walkie-talkie, or compare the photo angle with the magnifier overlay.
Reading a Red Edge on the Board
A red edge means two Rehaunted evidence board clues share a subject but differ on a measurable detail. The two most common axes of disagreement are time (when something happened) and placement (where something was found). The game will not tell you which axis is wrong; you have to look back at the source room and confirm one or the other with a fresh observation. Community testing on the early-access branch showed that roughly seven out of ten red edges resolve in favor of the magnifier reading, because the magnifier often exposes a secondary detail that the camera missed.
| Edge Color | Meaning | Typical Cause | Fastest Fix |
|---|---|---|---|
| Green | Both clues agree | Confirmed match | Continue board |
| Yellow | Partial match (1 axis agrees) | Wrong photo angle | Re-shoot with camera |
| Red | Full contradiction (time + place) | Misread object | Re-examine with magnifier |
| Grey | Disconnected, needs link | Missing connective clue | Search the same room with UV |
The Three-Layer Reading Method
Most contradictions only surface when you read the same fragment through three lenses in sequence. The magnifier captures the surface state, the camera exposes textures and micro-detail, and the walkie-talkie ties spoken dialogue to a timestamp. A photo, a magnifier inspection, and a walkie-talkie reply on the same object almost always line up, and when one of the three disagrees, that disagreement is the lead. Players who follow this loop consistently report that Rehaunted crime scene evidence flags surface about 40% faster than when they rely on a single tool per room.
Rehaunted Missable Clues by Room: A Layered Checklist
The single house is split into six load-bearing rooms, and each room hides at least three Rehaunted missable clues that only one tool reveals cleanly. The rooms below are listed in the order most players walk through them, and the checklist is designed to be cross-checked against the Rehaunted all evidence breakdown for a full count.
Living Room and Entry Hall
The front of the house is dense with social evidence: a coat hook, a dropped key, and a mirror frame that only the UV beam brings alive. The magnifier on the dropped key reveals a microscopic engraving that the camera cannot pick up, and the walkie-talkie chimes a distorted voice from the coat hook. None of these three fragments trigger a board prompt on their own, so they are easy to walk past.
| Object | Tool Required | Hidden Detail | Board Node Type |
|---|---|---|---|
| Dropped key | Magnifier | Engraved initials | Witness ID |
| Coat hook | UV flashlight | Faint handprint | Fingerprint record |
| Mirror frame | UV flashlight | Smudged message | Audio transcript |
| Entry rug | Camera (low angle) | Drag mark | Movement timeline |
Bedroom and Study
The bedroom hides the densest cluster of Rehaunted conflicting clues, because the room is staged with two competing stories. The diary on the desk is a primary source, but the audio recorder next to the bed contradicts one of its dates, and the magnifier on the diary spine exposes a torn-out page. Every player who skips the magnifier pass on the diary ends the night with one unresolved red edge. The Rehaunted hidden clues reference tracks similar clusters across the house and is worth cross-checking once the bedroom is cleared.
| Object | Tool Required | Hidden Detail | Common Conflict |
|---|---|---|---|
| Diary | Magnifier | Torn page residue | Date contradiction |
| Audio recorder | Walkie-talkie echo | Time-stamped voice | Diary mismatch |
| Bed frame | UV flashlight | Biological trace | Timeline offset |
| Desk drawer | Camera (close-up) | Hidden note | Witness ID |
Kitchen, Bathroom, and Basement Stair
The rear of the house is where Rehaunted contradictory evidence most often locks the case. The kitchen sink, the bathroom mirror, and the basement stair each carry at least two tool-specific fragments, and the basement stair in particular is the most-skipped location in the game. According to player reports, more than 60% of first-time players miss the basement stair nail because they do not crouch, and more than 70% of those players cannot finish the board without a re-run of that section. The Rehaunted crime scene investigation guide breaks down the UV-specific pass for the bathroom and basement, which is where most of the Rehaunted crime scene evidence tends to be confirmed.
| Room | Object | Tool | Hidden Detail |
|---|---|---|---|
| Kitchen | Sink drain | UV flashlight | Residue ring |
| Kitchen | Fridge handle | Magnifier | Smudge pattern |
| Bathroom | Mirror | UV flashlight | Hidden message |
| Bathroom | Floor vent | Camera (high angle) | Footprint |
| Basement stair | Loose nail | Magnifier (crouch) | Fabric fiber |
| Basement stair | Wall crack | UV flashlight | Blood trace |
Rehaunted How to Connect Evidence on the Board Step by Step
The board is not a free-form corkboard, and that is the part that surprises most players. There are only four valid edge types, and the game will reject any line you draw outside those four. Rehaunted how to connect evidence correctly is mostly a matter of learning the edge grammar and following a strict left-to-right flow.
Edge Types and When Each One Is Valid
The board accepts four edge types: witness (person-to-object), timeline (object-to-event), cause (object-to-object), and contradiction (which is the only red edge). A witness edge needs a portrait pin and an object pin, and the board only shows the candidate list once both pins exist. A timeline edge needs a timestamp, which is most often pulled from a walkie-talkie reply or a recorder log. Cause edges are the rarest and require two objects that physically interacted, and contradiction edges are auto-generated by the game whenever two pins disagree.
| Edge Type | Required Pins | Example | Failure Mode |
|---|---|---|---|
| Witness | Portrait + Object | "Witness saw the key" | Missing portrait |
| Timeline | Object + Timestamp | "Key dropped at 22:14" | No timestamp yet |
| Cause | Object + Object | "Key scratched the floor" | Objects never co-located |
| Contradiction | Object + Object | "Diary vs recorder" | Re-exam needed |
The Six-Step Wiring Loop
A reliable loop for any node is: re-photograph the object, re-inspect with the magnifier, replay the walkie-talkie clip, pin the node, draft the edge, and verify the edge color. The loop sounds mechanical because it is, and that is the point. According to community testing, players who follow the loop for every node resolve red edges in a single pass about 80% of the time, while players who improvise the loop end with an average of 3.4 unresolved red edges at the end of the night. The wire-puzzle-style loop is similar in spirit to the Rehaunted wire puzzle breakdown, which also relies on a strict color-to-color mapping.
| Step | Action | Tool in Hand | Expected Outcome |
|---|---|---|---|
| 1 | Re-photograph | Magnifier | New photo node |
| 2 | Re-inspect | Camera | Texture node |
| 3 | Replay clip | Walkie-talkie | Timestamp node |
| 4 | Pin object | Board cursor | New board pin |
| 5 | Draft edge | Board cursor | Edge appears |
| 6 | Verify color | Board cursor | Green / Yellow / Red |
Tool Pass Discipline and Walkie-Talkie Sync
The walkie-talkie is the only tool that exposes temporal data, so it is also the only tool that can resolve a time-axis contradiction. If two Rehaunted evidence board clues disagree on when something happened, the walkie-talkie reply almost always carries the correct timestamp, but only if you call the right contact at the right room. The walkie-talkie contact list is short, and each contact only answers when you are standing in the room that matches their beat.
Pass Order per Room
A consistent pass order is the difference between a clean board and a pile of red edges. The recommended order is: walk the room with the UV flashlight first, return with the magnifier for any surface that looked stained, finish with the camera for any object that has a printable detail, and only then call the walkie-talkie. Players who reverse the order end up with photos that the board rejects, because the photo node has to point to a detail the magnifier has already confirmed.
| Pass | Tool | Purpose | Common Miss |
|---|---|---|---|
| 1 | UV flashlight | Reveal hidden surface | Skipping the floor |
| 2 | Magnifier | Confirm micro-detail | Forgetting to crouch |
| 3 | Camera | Lock printable node | Wrong angle |
| 4 | Walkie-talkie | Lock timestamp | Wrong room |
Walkie-Talkie Reply Windows
Each walkie-talkie reply is gated to a window, and the window is shorter than most players expect. The bedroom contact only answers between 22:00 and 22:20 in-game, and the basement contact only answers once you have cleared the stair. Missing a window does not break the case, but it does mean the timestamp node stays grey, and that grey node will block any timeline edge you try to attach. Treat the walkie-talkie as a scheduled tool, and Rehaunted contradictory evidence tends to fall into place without manual reconciliation.
Save Scumming, Case Outcomes, and Recovery
Rehaunted has no mid-case save, so every choice is permanent within a single run. The case resolves at dawn, and the resolution is determined by how many green edges your board holds at that moment. A clean run with zero red edges and zero grey nodes ends with the strongest accusation, a board with red edges ends with a partial accusation, and a board with grey nodes ends with the wrong accusation.
What Each Ending Actually Means
The three endings are not flavor; they are diagnostic. The strongest accusation matches the diary, the recorder, and the basement trace, and only a board with every red edge resolved can hit it. The partial accusation matches two of the three sources and locks the case as "inconclusive but probable." The wrong accusation matches one source at best, and it is the ending most players hit on a first run because of a single missed Rehaunted missable clue in the basement. Players on the Rehaunted walkie-talkie reference often report that a careful first pass through the walkie-talkie windows is the single biggest predictor of the strongest ending.
| Ending | Required Board State | Typical Cause of Failure |
|---|---|---|
| Strongest | All green, no red, no grey | Skipped basement nail |
| Partial | All green, no red, any grey | Missed timestamp window |
| Wrong | Any red remaining | Unresolved contradiction |
Recovering from a Bad First Pass
If you reach the basement with a red edge still on the board, the cleanest recovery is to backtrack to the room whose node feeds the red edge, repeat the magnifier pass, and re-pin. The board will accept the new pin and discard the old one, which usually turns the red edge green. If the red edge is tied to a missing portrait, the recovery is a UV pass on the original room, because portraits are almost always hidden behind a UV-only smear. The 7-minute IGN gameplay pass on the Rehaunted IGN preview shows a clean version of this recovery loop in real time, and it is a useful reference for how fast the magnifier-to-board cycle should run.
Case File: A Worked Example of a Full Board
The fastest way to internalize the loop is to walk a single contradiction from red to green. Suppose the diary says the door was locked at 22:10, and the bedroom recorder places a voice at the door at 22:16. The board paints a red edge between the diary node and the recorder node, and it flags the timeline as unresolved. The recovery is to return to the bedroom, replay the walkie-talkie clip, and listen for the timestamp in the reply. The reply confirms 22:12, which means the diary is right and the recorder was off by four minutes. Pin the walkie-talkie timestamp, draw a timeline edge from the door to the new pin, and the red edge turns green on the next board refresh.
| Step | Input | Board Reaction | Status |
|---|---|---|---|
| Diary pin | "Door locked 22:10" | Node added | Pending |
| Recorder pin | "Voice at door 22:16" | Red edge | Red |
| Walkie-talkie reply | "Confirmed 22:12" | New timestamp node | Grey |
| Timeline edge | Door → Timestamp | Red → Green | Green |
That same loop, applied to every node, is what a clean Rehaunted run actually looks like. The board is not asking you to be a brilliant detective; it is asking you to be a methodical one, and the methodology above is the shortest path through a house full of Rehaunted conflicting clues.
Frequently Asked Questions
What counts as a Rehaunted missable clue?
A missable clue is any Rehaunted crime scene evidence that only one tool reveals and that does not trigger a board prompt on its own. The most common examples are UV-only smears, magnifier-only engravings, and walkie-talkie timestamps tied to a specific room. Once you leave the room, the tool-specific pass often becomes much harder, so treat every room as one-shot.
How do I tell when two Rehaunted evidence board clues actually conflict?
The board paints a red edge between two pins whenever they disagree on a measurable detail such as time, placement, or identity. A yellow edge means a partial match, a green edge means full agreement, and a grey edge means the pins exist but no link has been drawn. A red edge is the only one that blocks case progress, so prioritize red edges first.
Can I resolve Rehaunted contradictory evidence without restarting the case?
Yes. Return to the room whose object feeds the red edge, repeat the magnifier pass, and re-pin the node. The board will accept the new pin and discard the old one, which usually flips the red edge to green. If the red edge is tied to a missing portrait, run a UV pass on the same room because portraits almost always live behind a UV smear.
Do I need every Rehaunted missable clue for the best ending?
The strongest ending requires every node pinned, every red edge green, and every grey node resolved. Skipping a single basement-level fragment is the most common cause of a downgrade to the partial ending, because the basement is the only room that carries the third corroborating source. A clean first pass through every room with the recommended tool order is the safest route.
Which tool is most important for connecting evidence on the board?
The walkie-talkie is the single most important tool for Rehaunted how to connect evidence correctly, because it is the only tool that exposes timestamp data. The magnifier and camera surface object detail, but the walkie-talkie reply is what locks a timeline edge. Treat the walkie-talkie as a scheduled pass and call each contact only when you are in the right room, because the reply windows are short and room-specific.