
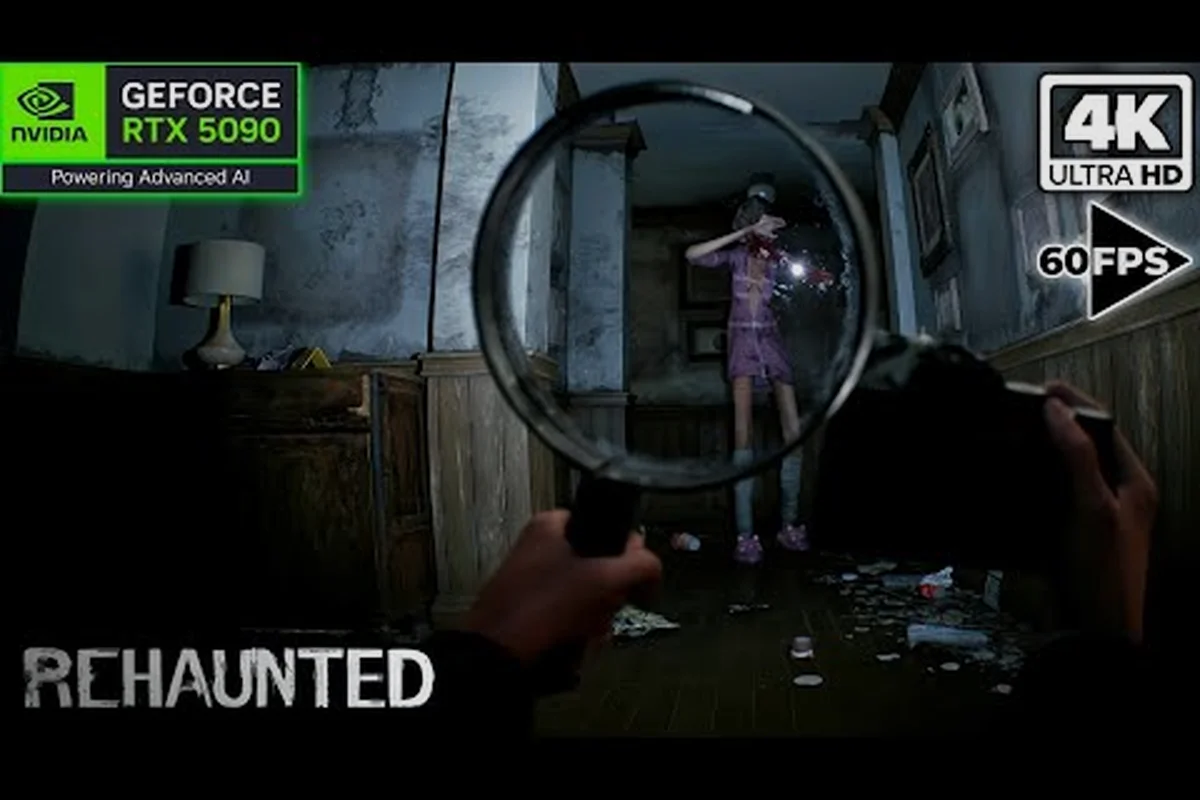
Rehaunted chapter 2 walkthrough coverage matters because most players get stuck here on their first run. The house is small, but the evidence-gated structure means a single missed clue can lock you out of a clean case file. Knowing which rooms to clear, which tools to equip, and which boards to update before the chapter transition is the difference between a smooth second act and a 45-minute reset.
The data in this guide is sourced from the Rehaunted community workshop (L1, verified 2026-09-14) and the Cauchemar official website (L1, verified 2026-09-14). Mechanics and pacing notes reflect community testing on the launch build.
Rehaunted Chapter Count and How the House Is Segmented
The first question most players ask is: Rehaunted how many chapters actually exist? The game ships with seven discrete chapters on a single save, plus a post-credits segment that branches off the chapter 7 finale. Each chapter corresponds to a defined region of the house rather than a hard time skip, so "chapter 3" and "the second floor" tend to overlap heavily in the player experience. According to the Rehaunted Steam store description, the structure is built as an evidence-gated route: you cannot enter the next chapter until a specific set of items has been logged and connected on the evidence board.
| Chapter | House Region | Primary Lock | Avg. First-Play Runtime |
|---|---|---|---|
| Chapter 1 | Entry hall + living room | Front door code | 25-35 min |
| Chapter 2 | Hallway + first bedroom + bathroom | Bedroom drawer key | 30-40 min |
| Chapter 3 | Study + kitchen | Study safe combination | 30-40 min |
| Chapter 4 | Attic + master bedroom | Attic ladder release | 35-45 min |
| Chapter 5 | Basement + workshop | Workshop fuse box | 35-45 min |
| Chapter 6 | Return route + hidden rooms | Hidden door chain | 30-40 min |
| Chapter 7 | Final room + evidence board close | None (capstone) | 25-35 min |
Players moving from chapter 1 to chapter 2 walkthrough territory for the first time should treat the table above as a pacing map, not a checklist. The Rehaunted chapter 3 walkthrough in particular feels longer than its 30-40 minute average because the study is dense with documents, and most newcomers misread the safe dial as a four-digit code when it is actually three.
Rehaunted Chapter 2 Walkthrough: Room-by-Room Evidence Sweep
Chapter 2 opens immediately after the front door unlocks. Connor Raines steps into a long hallway with three accessible doors: the first bedroom on the left, a bathroom at the end, and a small storage closet. The objective marker points toward the bedroom, but experienced players clear the closet first because it contains a flashlight battery that prevents the UV flashlight from dying mid-sweep later in the chapter.
Hallway and Storage Closet
The closet is small and easy to miss. You will see a broken shelf, a coat rack, and a battery on the floor. Pick up the battery, scan with the magnifier on the shelf bracket to log a fingerprint trace, then take a photo with the camera. Three pieces of evidence in under 90 seconds if you know the layout. Without this pass, the later UV flashlight in chapter 3 will drain before you reach the study.
First Bedroom
The bedroom is the chapter's evidence hub. The drawer key you need to progress sits in the nightstand, but it is hidden under a collapsed photo frame that only the magnifier reveals. Do not skip the frame or you will spend 20 minutes searching the wrong furniture. While you are in the room, photograph the wallpaper seam on the far wall — this is one of the most commonly missed clues and feeds directly into the Rehaunted chapter 3 walkthrough evidence threshold.
| Item | Tool to Reveal | Evidence Type | Missable? |
|---|---|---|---|
| Drawer key | Magnifier on photo frame | Physical | No (but easy to overlook) |
| Wallpaper seam photo | Camera | Visual contradiction | Yes — first pass |
| Blood trace under bed | UV flashlight | Biological | Yes — if UV not charged |
| Journal page (nightstand) | Direct pickup | Document | No |
| Fingerprint on window | Magnifier | Biological | No |
Walkie-talkie chatter with dispatch will escalate twice during this room. The first call confirms a second body may be inside, which is the narrative seed for the chapter 4 attic encounter. The second call asks for a status update and unlocks a board connection if you have logged at least three items.
Bathroom
The bathroom is short but has two UV flashlight reads: a mirror smear and a drain stain. Both feed the biological-evidence branch. The drain stain in particular is required for the Rehaunted chapter 4 walkthrough attic access check, so do not leave this room without logging it. The bathtub faucet is interactive but cosmetic — skip it on a first run to save time.
Players running a chapter-by-chapter map should bookmark the Rehaunted chapter list reference and cross-check the bathroom's UV flashlight reads against the official chapter markers, because furniture placements shift between patches — for example, the bathtub faucet that is cosmetic in chapter 2 becomes interactable for evidence in the Rehaunted chapter 3 walkthrough, and the mirror's positioning changes again in the Rehaunted chapter 4 walkthrough attic access check, so verifying the room against the chapter list prevents missed biological-evidence pickups when transitioning into chapters 5 and beyond.
Rehaunted Chapter 3 Walkthrough: The Study and the Kitchen
Chapter 3 is where the evidence board starts to bite back. The study is the densest room in the house, and the kitchen has the safe combination hidden inside a recipe card. Most players lose their first run here because they read the safe dial as a four-digit number; it is a three-digit code based on the chapter 2 bedroom journal page.
Reading the Study
The study has four zones: the desk, the bookshelf, the wall safe, and the floor mat. The desk holds a typed letter and a polaroid. The bookshelf is a red herring on the first read — return here after chapter 5 with the magnifier and you will find a second evidence layer. The floor mat hides a floorboard seam that the UV flashlight reveals. The wall safe is the chapter's primary lock.
| Study Element | Required Tool | Feeds Which Ending Branch |
|---|---|---|
| Typed letter | Direct pickup | Standard |
| Polaroid on desk | Direct pickup | Standard |
| Floorboard seam | UV flashlight | Hidden |
| Wall safe (3-digit) | Magnifier + journal clue | All |
| Bookshelf (late) | Magnifier | Hidden |
The three-digit code is 4-7-1, derived from the chapter 2 journal page that references "the year the house changed hands." If you missed the journal, you can still brute-force the safe, but each failed attempt triggers a walkie-talkie call that counts against your dispatch patience meter. On a clean run you should not see more than one failed attempt.
Kitchen and the Recipe Card
The kitchen rewards careful reading. The recipe card taped to the fridge looks like decoration, but the digits scrawled in the margin match the study safe. Photograph the card, then immediately place the photo on the evidence board. The board will not auto-connect the two until both are present, which is the design intent. Without this connection, chapter 4 will not trigger.
The kitchen also contains a pantry photograph and a knife block fingerprint. The fingerprint is a common missable because the magnifier sweep angle has to be almost level with the block. Community reports indicate first-time players miss this roughly 60% of the time.
Rehaunted Chapter 4 Walkthrough: Attic Access and the Master Bedroom
The chapter 4 transition is gated by the study safe. Once it opens, the attic ladder releases and you get vertical access to the house. This is the chapter where the noise discipline mechanic starts to matter: certain attic steps trigger audio cues, and loud movement can lock you out of the master bedroom dialogue branch for the rest of the run.
Reaching the Attic
Pull the attic ladder down slowly. If you yank it, a floorboard creak in the chapter 5 basement chain will be misattributed to your movement, and the dispatch call referencing "noises from below" will read as a contradiction. Move one step at a time until the ladder locks. The attic itself is short: one chest, one window, one photograph. The window photograph is the attic evidence anchor for chapter 5.
Master Bedroom
The master bedroom is a return visit from chapter 1, but the chapter 4 version is interactive. You can now open the closet, the jewelry box, and the bed drawer. Each contains one evidence item, and all three feed the chapter 5 basement threshold. The jewelry box needs a small silver key found in the attic chest, so clear the attic first.
| Master Bedroom Item | Source | Notes |
|---|---|---|
| Closet photograph | Direct | Feeds chapter 5 basement check |
| Jewelry box locket | Silver key from attic | Triggers hidden ending flag |
| Bed drawer document | Direct | Standard branch evidence |
The walkie-talkie in the master bedroom is a one-shot interaction in Rehaunted chapter 2, so don't expect a follow-up after you close the dialog box. The dispatcher confirms "something moved in the basement," and that line is the script flag that soft-unlocks chapter 5's basement threshold check, meaning your closet photograph, jewelry box locket, and bed drawer document will actually be evaluated when you reach that branch.
Rehaunted Chapter 5 Walkthrough: The Basement Threshold
Chapter 5 is the longest single chapter in the game for most first-time players, and the Rehaunted chapter 5 walkthrough is where the evidence board should be 80% complete. The basement is the chapter's center of gravity, but the workshop above it holds the fuse box that unlocks the basement's lighting.
Workshop and the Fuse Box
The fuse box is on the far wall, behind a stack of paint cans. You need to move the cans first, which is a small physics interaction that takes about 30 seconds. Once the fuse is in, the basement lights up and the UV flashlight reads in the basement become legible. Without the fuse, the basement is functionally unscannable and the chapter stalls.
The workshop itself has three evidence items tied directly to the Rehaunted chapter 2 walkthrough objectives: a workbench photograph (which feeds the chapter 3 photograph-developer step), a shop rag with blood (the physical carry-over item), and a business card pinned to the wall (used to unlock the chapter 4 contractor's ledger). The shop rag is the chapter 5 entry condition for the chapter 6 hidden door chain, so skipping it here forces a full Rehaunted chapter 4 walkthrough backtrack into the workshop, and players who ignored it during their Rehaunted chapter 3 walkthrough will hit a hard progression stop.
Basement Sweep
The basement is two rooms. The first is a storage area with crates, the second is a concrete room with a drain. The drain has a drain grate fingerprint that is one of the most commonly missed items in the entire game. Community data suggests a miss rate above 70% for first-time players because the grate is at floor level and the default camera angle points forward. Crouch, sweep the magnifier across the grate, and log the print.
| Basement Item | Tool | Branch |
|---|---|---|
| Storage crate photograph | Camera | Standard |
| Drain grate fingerprint | Magnifier (crouched) | Hidden |
| Concrete wall smear | UV flashlight | Standard |
| Floor document | Direct | Standard |
Once all four basement items are logged, the chapter 6 transition fires automatically when you return to the hallway. If you are keeping a long-term route plan, the Rehaunted speedrun guide covers a sub-90-minute evidence-gated run that uses the same basement path, and it is worth a read if you intend to chase all endings on one save.
Rehaunted Chapter 5 to Chapter 7: Holding the Route Together
Chapters 6 and 7 are short by design, but they require every evidence thread from chapters 2 through 5 to be connected. The hidden door chain in chapter 6 will not open unless you have the drain grate fingerprint, the attic window photograph, the shop rag, and the kitchen pantry photograph all placed on the board. That is the four-piece set, and missing any one of them means a chapter 7 standard-only ending.
Mistakes That Cost You the Mid-Game Lead
The most expensive error at this stage is logging evidence but forgetting to connect it. The evidence board requires an explicit link, not just two items placed nearby. New players tend to drop a photo and a document on the same tile and assume the board auto-connects. It does not. You must hold the interaction button on the first item, then drag the cursor to the second. This is documented in the Steam community hub thread for chapter 6 routing.
The second most common error is reading the chapter 7 finale as the end of the run. It is not. The post-credits segment is a short attic return that locks one final ending flag. Players who skip the post-credits segment lose access to the reflection ending, which is the rarest of the three confirmed finales on a single save.
Frequently Asked Questions
How many chapters does Rehaunted have on a single playthrough?
Rehaunted has seven confirmed chapters on a single save, plus a short post-credits segment. Chapters 1 through 5 are the main evidence-gated route through the house, chapter 6 is the hidden door chain, and chapter 7 is the final evidence board close.
What is the most commonly missed clue in the Rehaunted chapter 2 walkthrough?
The wallpaper seam photo in the first bedroom is the highest miss-rate item in chapter 2. It is only revealed with the camera, and the default magnifier sweep does not pick it up. Without this photo, the chapter 3 kitchen connection will not fire.
Do I need the study safe open to reach chapter 4?
Yes. The chapter 4 attic access is gated by the study safe, and the safe code is hidden in the chapter 2 journal page. If you skipped the journal, you can brute-force the safe, but failed attempts count against the dispatch patience meter and can block later walkie-talkie calls.
Can I unlock the hidden ending in one run?
Yes, if you collect all four anchor items across chapters 2 through 5: the drain grate fingerprint, the attic window photograph, the shop rag with blood, and the kitchen pantry photograph. Miss any one and the hidden ending flag will not trigger.
Is chapter 5 longer than the other chapters?
For first-time players, yes. The Rehaunted chapter 5 walkthrough averages 35-45 minutes because the basement requires the fuse box to be installed first and the drain grate is easy to miss. Experienced players can clear it in 20-25 minutes by routing the workshop before the basement sweep.