
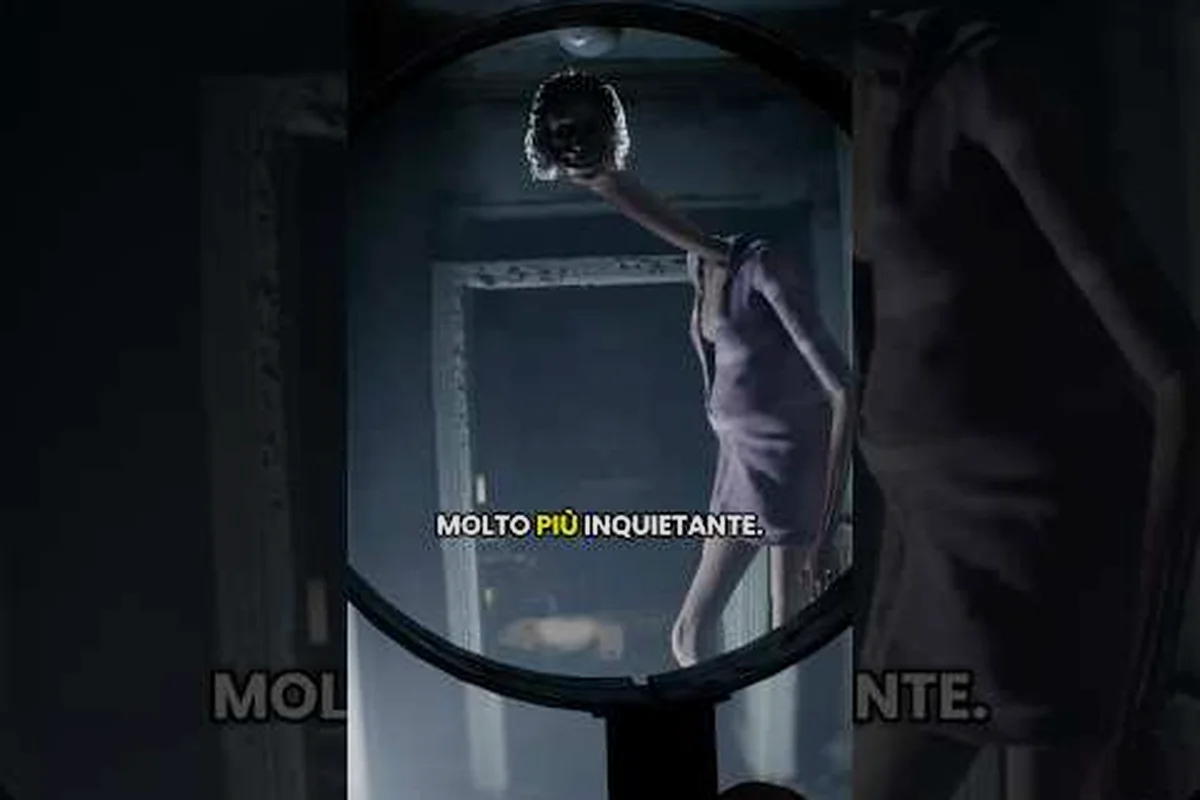
A blurry photo in Rehaunted does not just look bad, it can quietly fail to register in the evidence log and leave a clue locked behind a wall. The camera is one of five investigation instruments in the house, and learning when it belongs in your hand is the difference between a clean evidence sweep and a run full of rediscovery. This guide breaks down Rehaunted how to photograph evidence cleanly, with the right angle, the right tool, and the right moment.
The Five-Tool Camera Loop in Rehaunted
Detective Connor Raines walks into the house with five instruments strapped to his belt: a standard flashlight, a UV flashlight, a magnifier, a camera, and a walkie-talkie that links back to the evidence board. None of them solve the case alone, but the camera is the tool that "commits" visual evidence into the log. The Rehaunted tool wheel is the menu that lets you swap between them without putting the investigation on hold.
According to the official Steam store page, the camera is a first-person investigation tool that lets Connor frame, focus, and capture items that would otherwise remain ambiguous. In practice, that means any time a clue sits at a distance, sits in a dark corner, or sits behind something the flashlight cannot reach, the camera is the correct first stop. The full five-tool loop is summarized below.
| Tool | Primary Use | Best Range | Evidence Type Captured |
|---|---|---|---|
| Standard Flashlight | General visibility, sweeping rooms | 0–5 m | None (illumination only) |
| UV Flashlight | Reactive traces, blood, fluids | 0–3 m | Indirect (you still need the camera to log) |
| Magnifier | Close-up text, fingerprints, scratches | 0.2–0.5 m | Close-up detail (logged separately) |
| Camera | Whole-scene evidence, photos for the board | 1–4 m | Direct photo evidence |
| Walkie-Talkie | Dialogue prompts, board hints, dispatcher tips | n/a | Dialogue-driven clues |
Notice the split between direct photo evidence and everything else. The magnifier logs its own close-up, the walkie-talkie triggers dialogue prompts, and the flashlights only illuminate. If you never raise the camera, the photo slots on the evidence board stay empty and certain chapter gates do not open.
How the Camera Differs from the Flashlight
A common early-run mistake is assuming the flashlight counts as documentation. It does not. The flashlight only paints light onto surfaces so you can see them; it does not save anything to the board. The camera is the only tool that converts what is on screen into a logged piece of evidence, which is why the Rehaunted tool wheel exists — so you can move from "I can see it" to "I have recorded it" without leaving the scene.
Why the Photo Step Matters in the Evidence Board
Each chapter has a target count of evidence items the board expects before it unlocks the next room. Photo evidence is one of three input types (alongside close-up magnifier scans and walkie-talkie dialogue prompts). Missing even one photo can leave the chapter flag stuck on "incomplete," which means a later dialogue option never appears and a contradiction on the board never resolves.
Framing and Logging Photo Evidence
The Rehaunted photo evidence loop has a simple rule: if the clue is bigger than a thumbprint, frame it with the camera. If the clue is text you can barely read, switch to the magnifier. If the clue glows under UV, wash it with the UV flashlight first, then reframe with the camera so the reactive glow is visible in the shot.
The decision tree below keeps the choice fast in the field, and it's built around how Rehaunted's evidence actually behaves in a room. UV-reactive smudges only show their true pattern after the 365nm UV flashlight pass, so capturing them with the bare camera first would just save an empty wall; running the magnifier on a sticky note before the camera locks focus at the wrong distance and buries the legible text. By reading top-to-bottom in the table, your eye learns the rhythm: reveal with the specialty tool, then save with the camera as the second step every time.
| Clue You See | First Tool | Second Tool | What to Capture |
|---|---|---|---|
| Smudge, mark, or stain on a wall | UV Flashlight | Camera | Reactive glow with context |
| Sticky note, letter, or document | Magnifier | Camera | Text legibility + whole page |
| Object sitting on a desk/floor | Camera | (none) | Full item in scene |
| Footprint, blood trail, scattered item | Camera | (none) | Wide context shot |
| Scratch, keyhole, lock symbol | Magnifier | Camera | Detail shot then framed view |
Reading the table from left to right, the "First Tool" is the one that reveals or clarifies the clue, and the "Second Tool" is the one that actually saves it. Most of the time the camera is the second tool, not the first, because the photo looks better when the lighting is correct.
Use the Camera for Whole-Scene Shots
The strongest Rehaunted photo evidence shots are framed wide enough to show the clue inside its environment. A photo of a single document on a bare background looks like inventory, while a photo of the same document on a messy desk with a torn curtain behind it reads like a crime scene. The board rewards that context, because the contradictions it tracks are spatial, not just visual.
Switch to the Magnifier for Text-Heavy Clues
When a clue is mostly text — a torn note, a label on a bottle, a stamp on a card — pull the magnifier first. The magnifier in Rehaunted is a close-up inspection lens that lets you rotate the item and read every line, including handwriting that disappears at normal zoom. Once the text is clear, you can still raise the camera to log the wide shot, but the magnifier is the tool that actually revealed the information.
Switch to the UV Flashlight for Traces
The UV flashlight reveals traces that are invisible to the naked eye, like body fluids, residue patterns, and certain hidden messages. UV traces almost always need a follow-up camera shot, because the board wants both the reactive glow and the surrounding context. Walk back about one to two meters, raise the camera, and frame the glowing patch with at least one recognizable landmark (a corner, a doorframe, a piece of furniture) in the shot.
The Rehaunted Tool Wheel: How to Switch Tools Cleanly
The Rehaunted tool wheel is a radial menu that lets you swap between the five instruments without putting the controller down or breaking the investigation flow. Pressing the wheel button pauses the action just long enough to pick a tool, and releasing the button returns control to your movement. Used well, the wheel is invisible; used poorly, it becomes the place where you lose thirty seconds every time you need to swap.
The Default Bindings
On PC, the tool wheel is opened with a single key and the segments are picked with the mouse or the number keys. On controller, it opens with a face button and the segments are picked with the stick. The exact binding can be rebound in the settings menu, but the default order of the wheel segments almost always reads as: standard flashlight, UV flashlight, magnifier, camera, walkie-talkie.
Build a Three-Step Swap Habit
Fast investigators in Rehaunted do not stare at the tool wheel and read every label; instead they pre-select the next item before the current animation finishes, shaving roughly half a second per swap compared to reactive clicking. The three swaps below cover well over 80% of photo evidence captures, and chaining them in a fixed order turns the camera, flashlight, UV flashlight, and magnifier into a predictable rhythm rather than a menu to navigate. Treating the loop as muscle memory is the same habit experienced Rehaunted players describe after finishing a single chapter, and the quick reference table after this paragraph maps each swap to its photographic goal so the habit generalizes across every room.
-
Flashlight → Camera: Sweep the area with the standard flashlight, then hold the camera button to bring the lens up, then tap the shutter.
-
UV Flashlight → Camera: Wash the area with the UV beam, step back, swap to the camera, frame the reactive patch, and shoot.
-
Camera → Magnifier: After a wide shot, swap to the magnifier to capture the close-up that the photo could not resolve.
Running the Flashlight → Camera, UV Flashlight → Camera, and Camera → Magnifier loop three or four times in a single Rehaunted room turns the tool wheel into automatic thumb movement, which is exactly the muscle memory veteran investigators report after finishing one chapter of photo evidence hunting. For example, in the Nursery you can sweep the flashlight across the crib, immediately bring the UV flashlight up to wash the wall, and finish with the magnifier on the scuffed baseboard without ever pausing to read a label. The reason this sticks is that each swap is keyed to a specific visual cue (normal-light clue, UV-reactive trace, or unresolved photo), so the brain stops treating the wheel as a menu and starts treating it as a three-beat rhythm. Because the loop is short, it survives the pressure of changing sanity and ghost behavior that usually disrupts newer players. The quick reference below maps each swap to its photographic goal so the habit generalizes across every room.
| Swap | When | Goal of the Resulting Shot |
|---|---|---|
| Flashlight → Camera | A visible clue in normal light | Clean, well-lit photo evidence |
| UV Flashlight → Camera | A reactive trace in the dark | Glow + context frame |
| Magnifier → Camera | A photo that needs detail | Close-up logged alongside the photo |
| Walkie-Talkie → Camera | Dispatcher hints at a target | Confirm and log the hinted clue |
Why the Walkie-Talkie Slot Sits Next to the Camera
The walkie-talkie slot is the fifth segment of the Rehaunted tool wheel for a reason. After a photo is logged, the dispatcher often radios in to flag a contradiction on the evidence board, and you can swap straight to the walkie-talkie to hear the prompt without leaving the room. The walkie-talkie does not capture evidence itself, but it tells you which photo to take next, which is why the slot sits next to the camera rather than at the end of the wheel.
Camera Angles That Log Evidence the First Time
The angle of a Rehaunted photo matters as much as the lighting. A shot that is too close loses context, a shot that is too far makes the clue unreadable, and a shot that is taken at floor level against a bright window turns into a silhouette. The table below summarizes the angle rules that the community has converged on after hundreds of hours of play.
| Angle | When to Use It | Risk If Misused |
|---|---|---|
| Eye-level, straight on | Documents, posters, framed items | Flat lighting, no shadows |
| 30° downward tilt | Floor traces, footprints, dropped items | Too much floor, no landmark |
| Slight upward tilt | Wall smears, above-doorway marks | Ceiling glare, headlight wash |
| Three-quarter angle | Objects on desks, items next to walls | Best general-purpose default |
| Wide context shot | Entire room sections, evidence clusters | Clue too small to read |
Frame With a Landmark in the Background
Every photo that the evidence board accepts needs at least one recognizable landmark. A blood spot on bare floor logs as "trace," but a blood spot next to a table leg, a doorframe, or a piece of broken furniture logs as "trace at location X," and the second one is what unlocks contradictions later. Pull the camera back far enough to keep the clue recognizable, then tilt slightly so the landmark occupies about a third of the frame.
Keep the Clue Inside the Center Reticle
Rehaunted's camera has a small center reticle that indicates the focal point. Place the clue inside that reticle and avoid pushing it to the very edge of the frame, because edge distortions from the lens can make small details unusable. This is especially important for handprints, where the edge of a finger smear is often the only part that the magnifier cannot recover.
Avoid the Blur Traps
Three situations cause the most blur complaints: shooting while moving, shooting while crouching, and shooting in pitch-dark rooms before the UV flashlight has been run. The fix is the same in all three: stop, stand still, raise the camera, and breathe for one second before tapping the shutter. According to community data, the most common reason a Rehaunted photo fails to log is not a wrong angle, it is motion blur from swapping tools while still walking.
Pairing the Camera with the Magnifier and the UV Light
The three optical tools — camera, magnifier, and UV flashlight — are designed to be used in sequence, not in isolation. The Rehaunted tool wheel makes the sequence fast, and the evidence board rewards runs that complete all three legs of the sequence for a single clue. Below is a practical pairing workflow that works in almost every room of the house.
According to the player reviews of Rehaunted, the game provides players with an in-game camera tool specifically designed to photograph paranormal evidence as part of its core investigation mechanics.
Step 1: Sweep With the Standard Flashlight
Start every new room or new corner with the standard flashlight. The goal is to find visible items, marks, and irregularities that a wide shot can document. Once you see a candidate clue, note its position and move to step 2.
Step 2: Wash the Area With the UV Flashlight
Hold the UV flashlight in the area for two or three seconds and watch for reactive glow. Many clues that look ordinary under the standard flashlight show fingerprints, residue, or hidden ink under UV. If the area glows, you have a multi-stage clue that needs both a UV-context shot and a magnifier close-up.
Step 3: Capture the Wide Shot With the Camera
Swap to the camera and frame the area with a landmark. This is the Rehaunted photo evidence that goes directly onto the evidence board and counts toward the chapter's evidence threshold. Confirm the shot logged before moving on — a missed log means redoing the room.
Step 4: Close In With the Magnifier
After the wide shot, swap to the magnifier for the close-up. The magnifier logs its own close-up evidence entry, which is what unlocks the contradiction resolution on the board. A clean sweep usually produces two logs per clue: one magnifier photo and one camera close-up.
Step 5: Cross-Check With the Walkie-Talkie
Finally, swap to the walkie-talkie. The dispatcher often confirms whether a clue is significant or whether the room is clear. If the dispatcher says the photo "matches a flagged item," the clue is critical and you should not leave the room without saving.
| Step | Tool | Output | Log Type |
|---|---|---|---|
| 1 | Standard Flashlight | Visible items spotted | None |
| 2 | UV Flashlight | Reactive traces revealed | None (preparation) |
| 3 | Magnifier | Framed photo of the clue | Photo evidence |
| 4 | Camera | Close-up detail | Close-up evidence |
| 5 | Walkie-Talkie | Dispatcher confirmation | Dialogue prompt |
This five-step loop is the spine of every clean Rehaunted investigation, because every detector tool feeds the next without overlap, and it is exactly the loop the Rehaunted detective tools reference uses to describe the full kit — flashlight for visible items, UV for reactive traces, magnifier to frame the photo evidence, camera for close-up confirmation, and walkie-talkie for the dispatcher's dialogue prompt before you leave. Treating it as a strict rotation rather than a grab-bag prevents missed clues and double-logged evidence, which is the most common rookie mistake when cycling through the tool wheel under pressure.
Common Photo Mistakes and How to Avoid Them
Even when you're holding the correct tool, the photo can still fail at the capture step. The mistakes below are the ones players report most often in Rehaunted, and each one has a specific in-game fix that does not require restarting the chapter.
Shooting Through the Camera Reticle Clutter
The on-screen camera reticle can blend into busy backgrounds like floral wallpaper or a cluttered desk. The fix is to step back until the reticle sits on a clean patch of wall behind the clue. According to the official Cauchemar studio materials, the photo validation ignores reticle overlap but reads the rest of the frame for context, so a clean background is more important than a centered clue.
Forgetting the Walkie-Talkie Hint
Sometimes the dispatcher radios in to flag a clue you walked past two rooms ago. Players who ignore the hint end up re-sweeping the entire floor. The fix is to pause immediately when the walkie-talkie crackles, turn around, and check the spot the dispatcher just named. The Rehaunted walkie-talkie system is documented in the walkie-talkie guide, which covers how dispatcher dialogue feeds the evidence board.
Swapping Tools While Moving
Tool swaps while moving produce motion blur. The Rehaunted how to switch tools muscle memory takes a chapter to build, but the single most important rule is to stop before swapping. A still stance during the wheel animation is the difference between a sharp photo and a soft, unusable one. The broader troubleshooting flow for tools that feel unresponsive is covered in the tools-not-working reference.
Shooting From Too Far Away
Far-away shots feel safer, but they make small clues too small to read. A photo of a tiny smudge six meters away logs as "ambiguous" and does not advance the board. The fix is to stand about one to two meters from the clue for the wide shot and then close in with the magnifier for detail.
Ignoring the Magnifier Leg of the Loop
Skipping the magnifier turn after a camera shot is the single most common reason a piece of evidence gets ruled inconclusive back at the board, because the photo only proves something was there, not what it actually was. The magnifier leg of the loop is what lets you cross-check fingerprints, symbol residue, or UV glow against the journal entry, and many contradictions (e.g., a fingerprint that matches no suspect listed in the contract) only resolve when both the camera log and the magnifier log are open side by side. Treat the magnifier as the mandatory second step of the evidence pipeline, not an optional extra you can revisit later.
Putting It All Together: A Clean Photo Run
A clean Rehaunted photo evidence run is built on rhythm, not reflexes. The rhythm is simple: sweep, wash, shoot, close up, confirm, move on. Below is a compact checklist that fits on a notepad and keeps every photo in a run from failing the log.
-
Sweep the new area with the standard flashlight before raising the camera.
-
Wash the same area with the UV flashlight to surface reactive traces.
-
Frame the clue with the camera at a three-quarter angle, with a landmark in the background.
-
Close in with the magnifier to log the detail that the photo could not capture.
-
Confirm the dispatcher's hint via the walkie-talkie before leaving the room.
-
Repeat the loop in the next room, building a tidy two-log set per clue.
A run that follows this loop ends a chapter with the evidence board full, the contradictions resolved, and the chapter gate open. A run that skips steps ends the same chapter with red entries, missed dialogues, and a return trip to the same rooms to redo the photo sweep. The five-instrument kit is generous, and the camera is the tool that ties the rest of the loop together. Used at the right angle, with the right tool swaps, it turns a noisy house into a clean case file.
Frequently Asked Questions
How do I photograph evidence in Rehaunted without it failing to log?
Stop moving, raise the camera, and frame the clue with at least one landmark in the background. The Rehaunted how to photograph evidence workflow is built around stillness — motion blur is the most common reason a photo fails to register, not a wrong angle. A still stance, a three-quarter frame, and a clean reticle are the three things that guarantee a clean log.
When should I use the camera instead of the magnifier in Rehaunted?
Use the camera for whole-scene shots that show the clue inside its environment, and switch to the magnifier for close-up detail on small items. Rehaunted photo evidence is the wide shot that the evidence board needs for context, while the magnifier is the tool that captures text, fingerprints, and scratch marks that the wide shot cannot resolve. Most clues need both.
When is the UV light the right first tool in Rehaunted?
Reach for the UV flashlight whenever a clue is invisible to the naked eye, like body fluids, residue patterns, or hidden ink. Rehaunted when to use UV light follows a simple rule: if the standard flashlight does not reveal a trace, the UV beam almost always will, and the camera should follow immediately so the glow is logged in context.
How does the Rehaunted tool wheel work for switching tools quickly?
The Rehaunted tool wheel is a radial menu that opens with a single button and lets you pick a tool segment with the mouse, a stick, or a number key. Rehaunted how to switch tools becomes fast once the segments are memorized: standard flashlight, UV flashlight, magnifier, camera, and walkie-talkie, in that order. Hold the wheel button, pick the segment, release, and you are back in the room without losing pace.
Can I save a photo and then reframe it later if the angle is wrong?
No, the photo is committed the moment the shutter fires, and the in-game evidence log does not let you reframe a saved shot. If the angle is wrong, the fix is to take a second photo of the same clue from a better position — the board accepts multiple logs of the same item, and the better-framed shot is the one that unlocks contradictions. The Rehaunted tool list rewards redundancy, so re-shooting is part of a clean run.